Get in touch

See anything you like, or want to talk about working together? We’re always up for a chat.
- ✉ matt@yelldesign.com
- 📞 +(61) 418 562 251
-
🏢
201/26 Rokeby Street,
Collingwood VIC 3066 Australia
Mega Mini Models
Another day another epic build here at yelldesign.
We were recently approached to take on the task to build (and film) mini models of the iconic Melbourne Museum and Royal Exhibition buildings. Weʼve undertaken some big builds over the years, but this job looked like it was going to top everything to date. And we weren’t wrong…
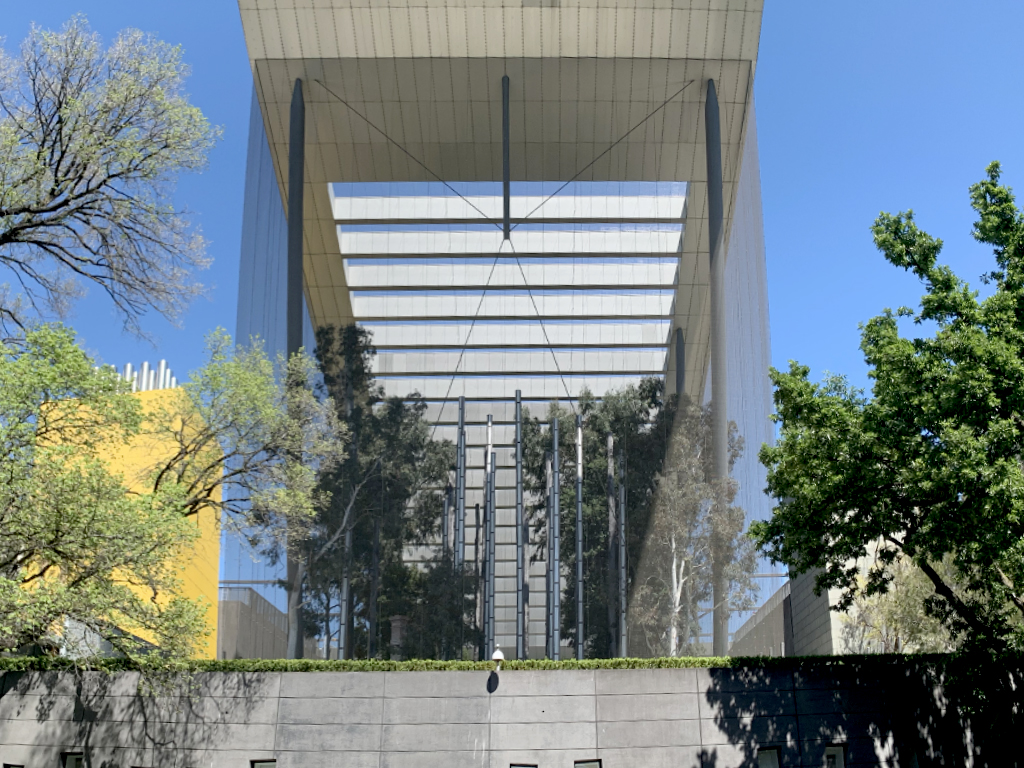
But, being suckers for a challenge, we took a deep collective breath and got stuck into the first phase – planning how tackle this behemoth! Fortunately, Melbourne Museum isn’t far from our studio, so we did a quick reconnaissance mission to take in all the amazing details in real life. And boy, there were some serious details!
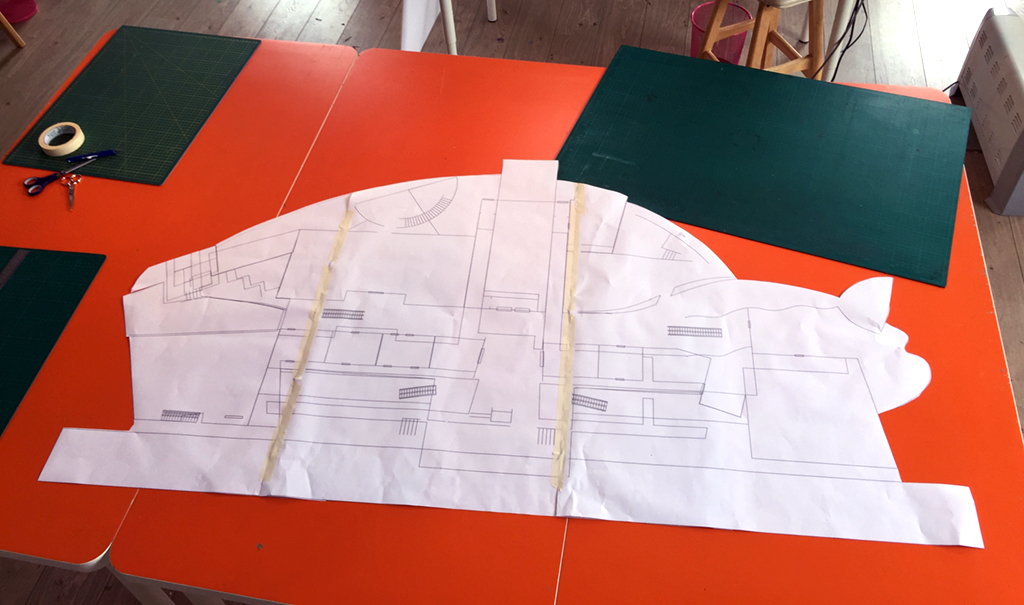
Next up we tackled resizing the architectural drawings that Melbourne Museum had kindly provided. These were going to be printed out help us set the scale for the mini models. Then it was onto the first major task – recreating all those intricate building details as vector drawings that we’d then be able to feed into our trusty laser cutter. This job always takes a while. But it’s super important we get it right first up – which then saves a whole lot of time when cutting all the pieces for the build.
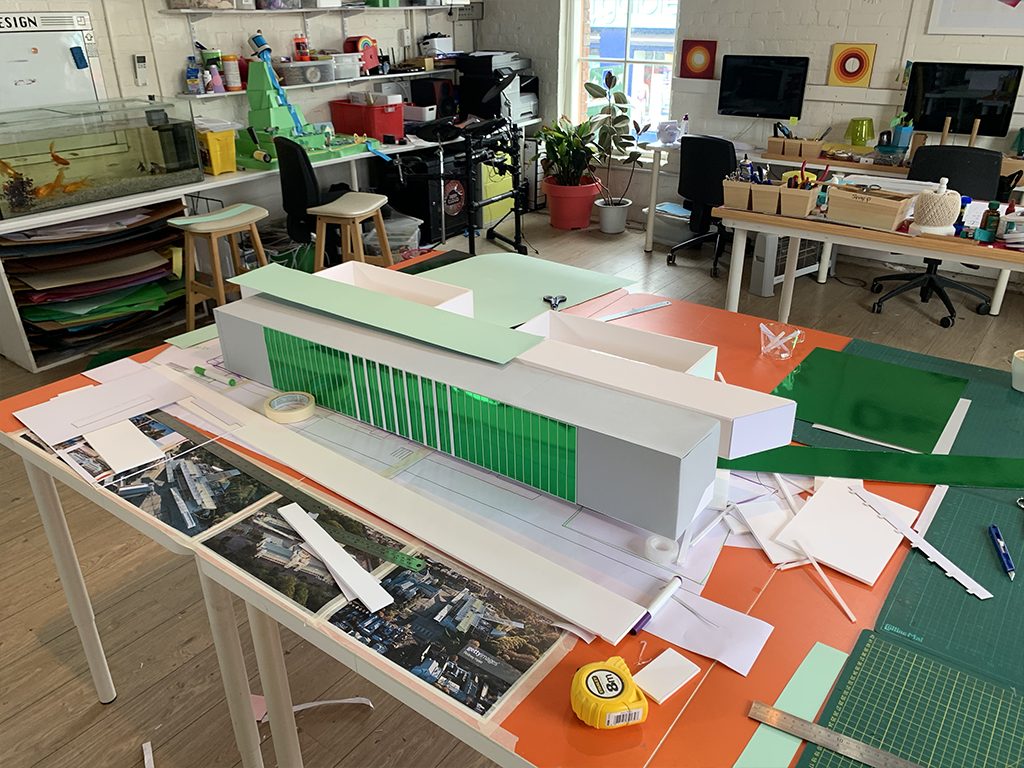
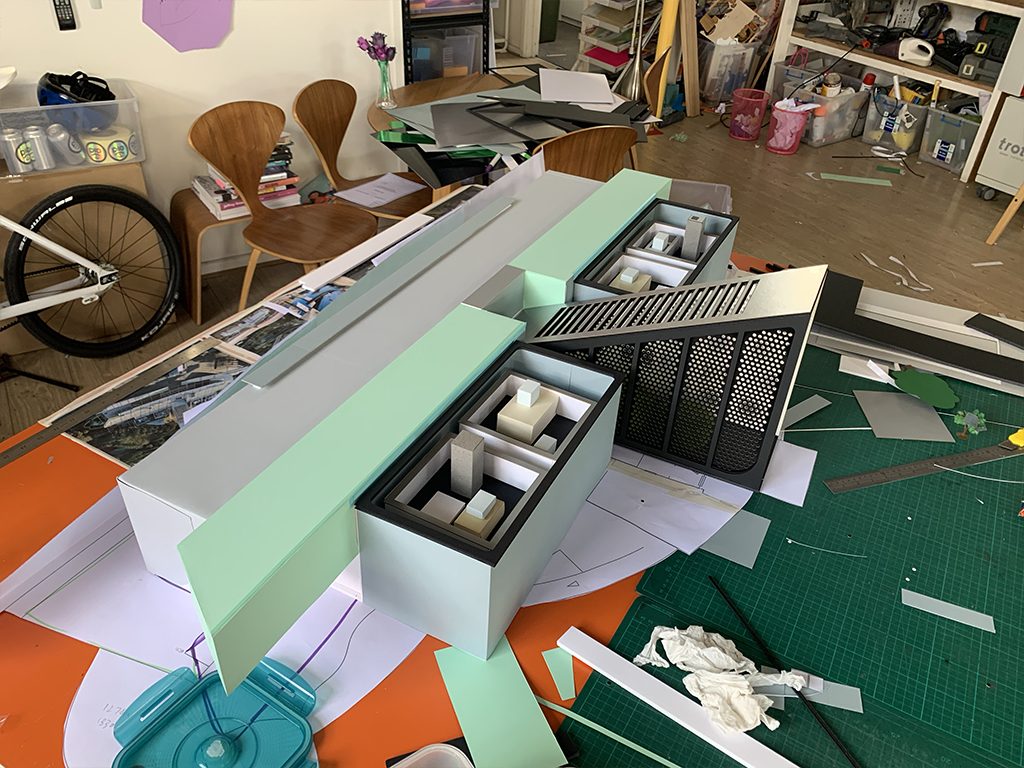
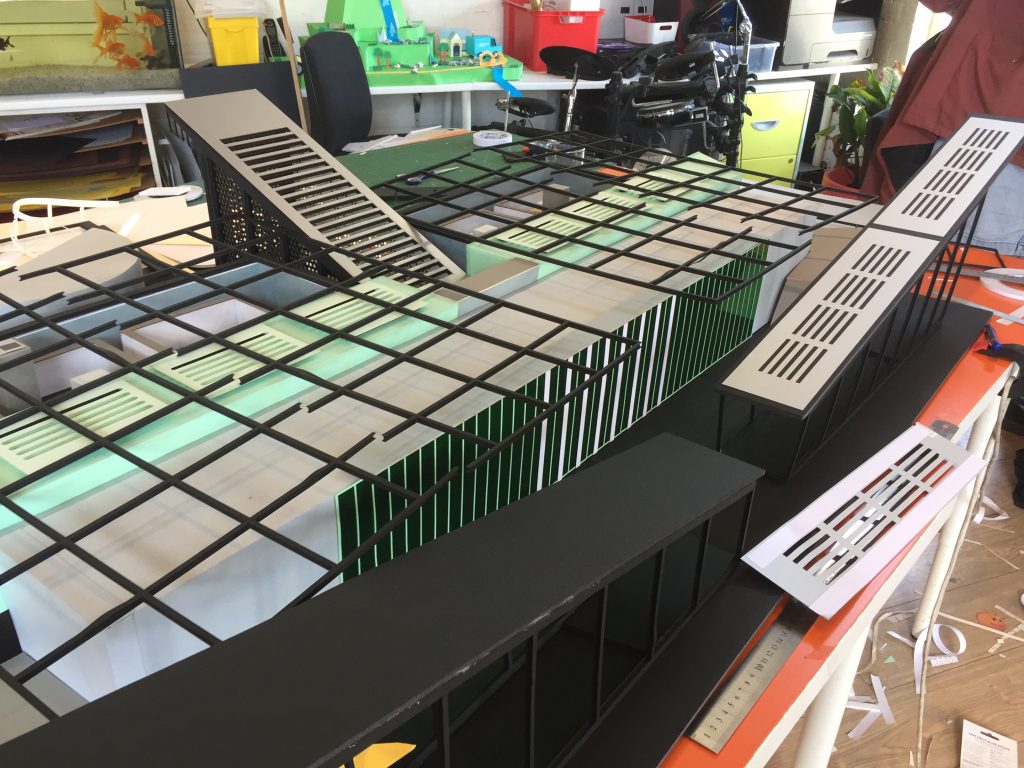
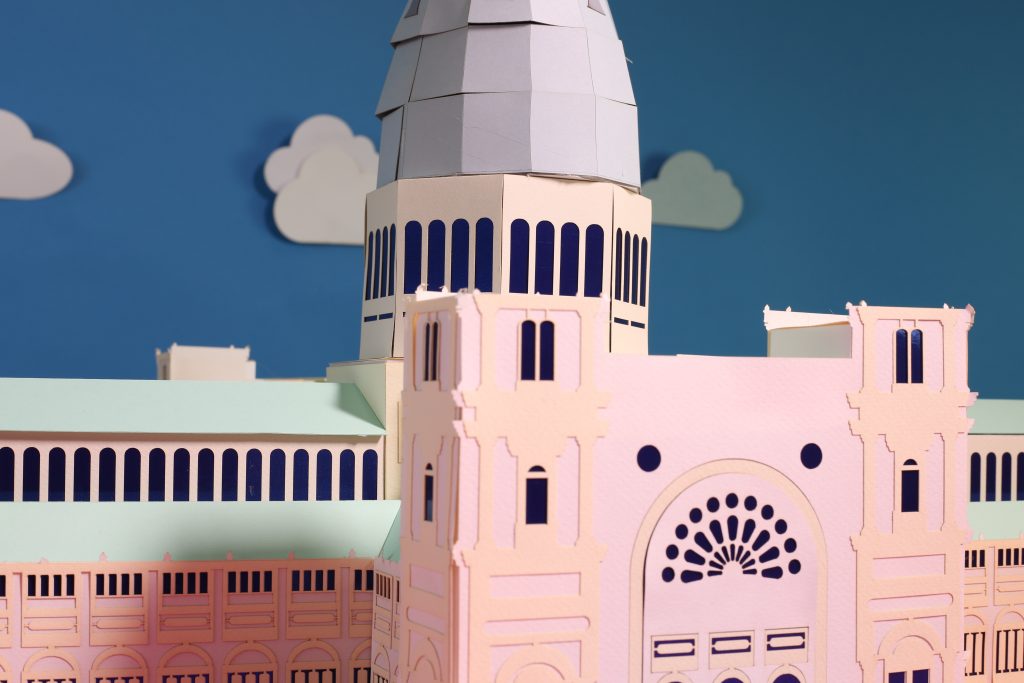
Then it was all hands on deck with the build. We didn’t have a lot of time so we started with the Melbourne Museum first – as this was a slightly more complex build that included a wide variety of shapes, angles, patterns and colours. The primary frame of the model was created from laser cut foam core – which provides a really solid base to build on. The building details were then finished off with paper of varying weights and textures to get it as close as possible to looking like the real thing
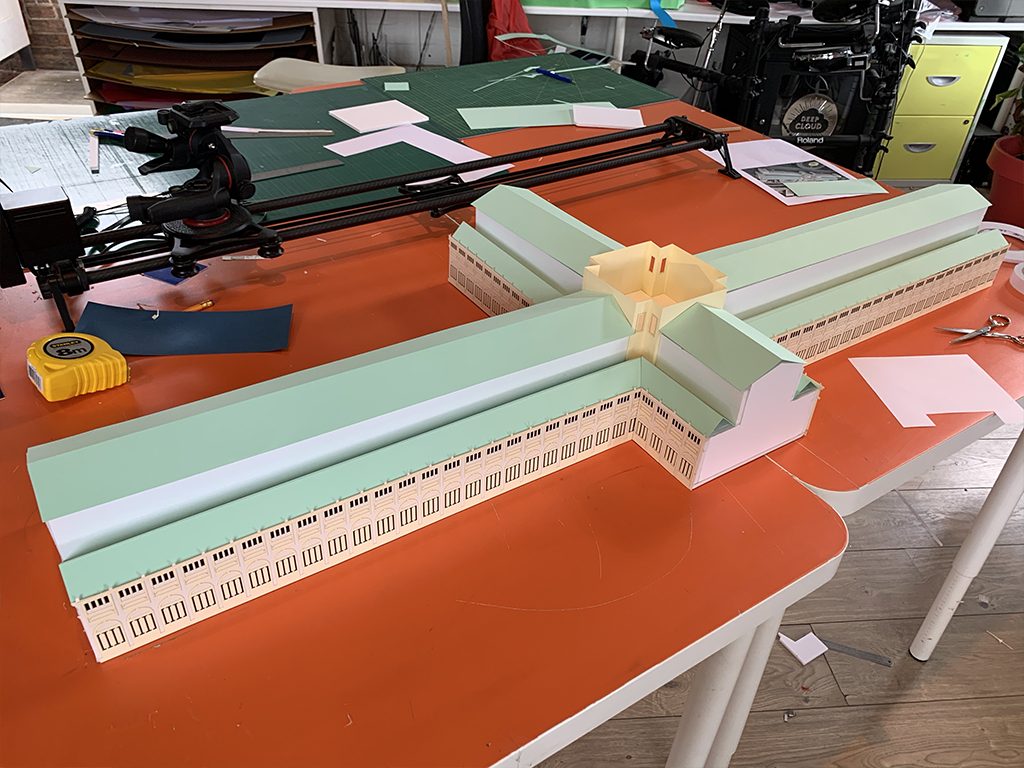
With the Museum done, it was time to focus on the Royal Exhibition building and get stuck into cutting all those windows. We were able to save a little bit of time here by cutting the window details for each wing as long single pieces. But still a fiddly job none the less. Again, the building frame was laser cut foam core which was then layered with paper for all the finishing touches.
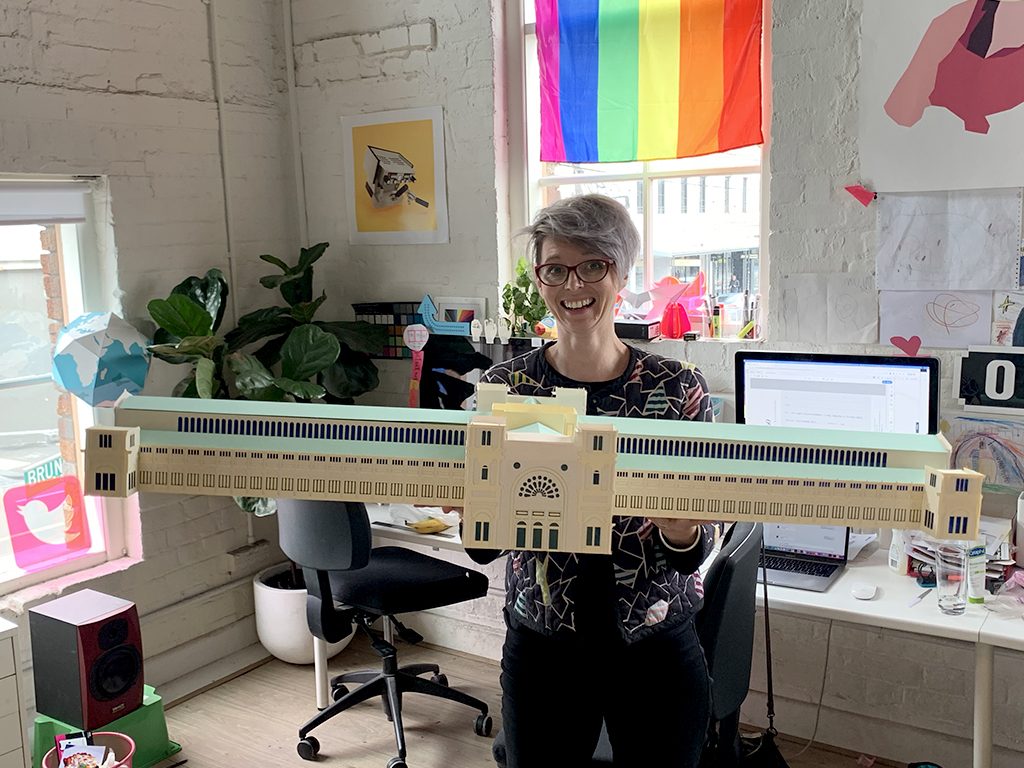
And the best part about this project? Not only did we enjoy it – but we took loads of BTS footage so you can enjoy the process in all its tiny detail too!!